

If you are just getting started with Depositphotos and need to get setup then you are in the right place, in this post I am going to show you how to signup for a contributor account and upload your first photos for sale on deposit photos, but before do, I am going to review how much money you can earn selling your photos on this site.
How much money can you make on Depositphotos?
Deposit photos is a Microstock site, you can upload your photos and then Deposit photos will sell them to their customers and send you a portion of the sales. The cut you get from each photo sale depends on two main factors, how much the customer paid for it and your level as a contributor.

First, let's look at how much customers pay for your photos, there are a lot of different options but they can be broken into two main types, subscriptions or on demand.
Subscriptions are for companies that constantly need photos each month and is the best deal for buyers while on demand is buying a group of images and the more you buy the cheaper it gets, also it is possible to buy an on-demand extended licence which allows people to sell merchandise with your images on them. That is how much the photo buyer pays, now let's look at how much you get paid as a contributor. Depositphotos pays based on your level and your level is based on your sales. Here is how it breaks out.

I have about 1500 photo downloads on Depositphotos so I am at the bronze level. So for every subscription download I get 31 cents and on demand downloads I get 36%. The most expensive on demand licence is the extended licence for $89 so for that sale I would get about $32. So, it is a pretty wide range for what I could make off any download from 31 cents to $32. Unfortunately, the $32 downloads are few and far between, while the 31 cent downloads are pretty frequent most of the time I get under $2 a download.
How to become a Depositphotos contributor?
Alright, so now you know what to expect, let's get into how to sign up. Follow this link to take you to the contributor signup page.
Step 1: Fill out the form on the first page
Make sure you enter all the information in accurately and it matches your ID (which you will need to upload in a later step.

Step 2: Submit 5 photos for review
After you submit the form you will need to upload 5 images for review, when you do this, choose your best 5 images because Depositphotos is going to review those images and make a decision if they will approve you as a contributor. I am just going to upload 5 of my photos that haven’t been uploaded to Depositphotos yet.
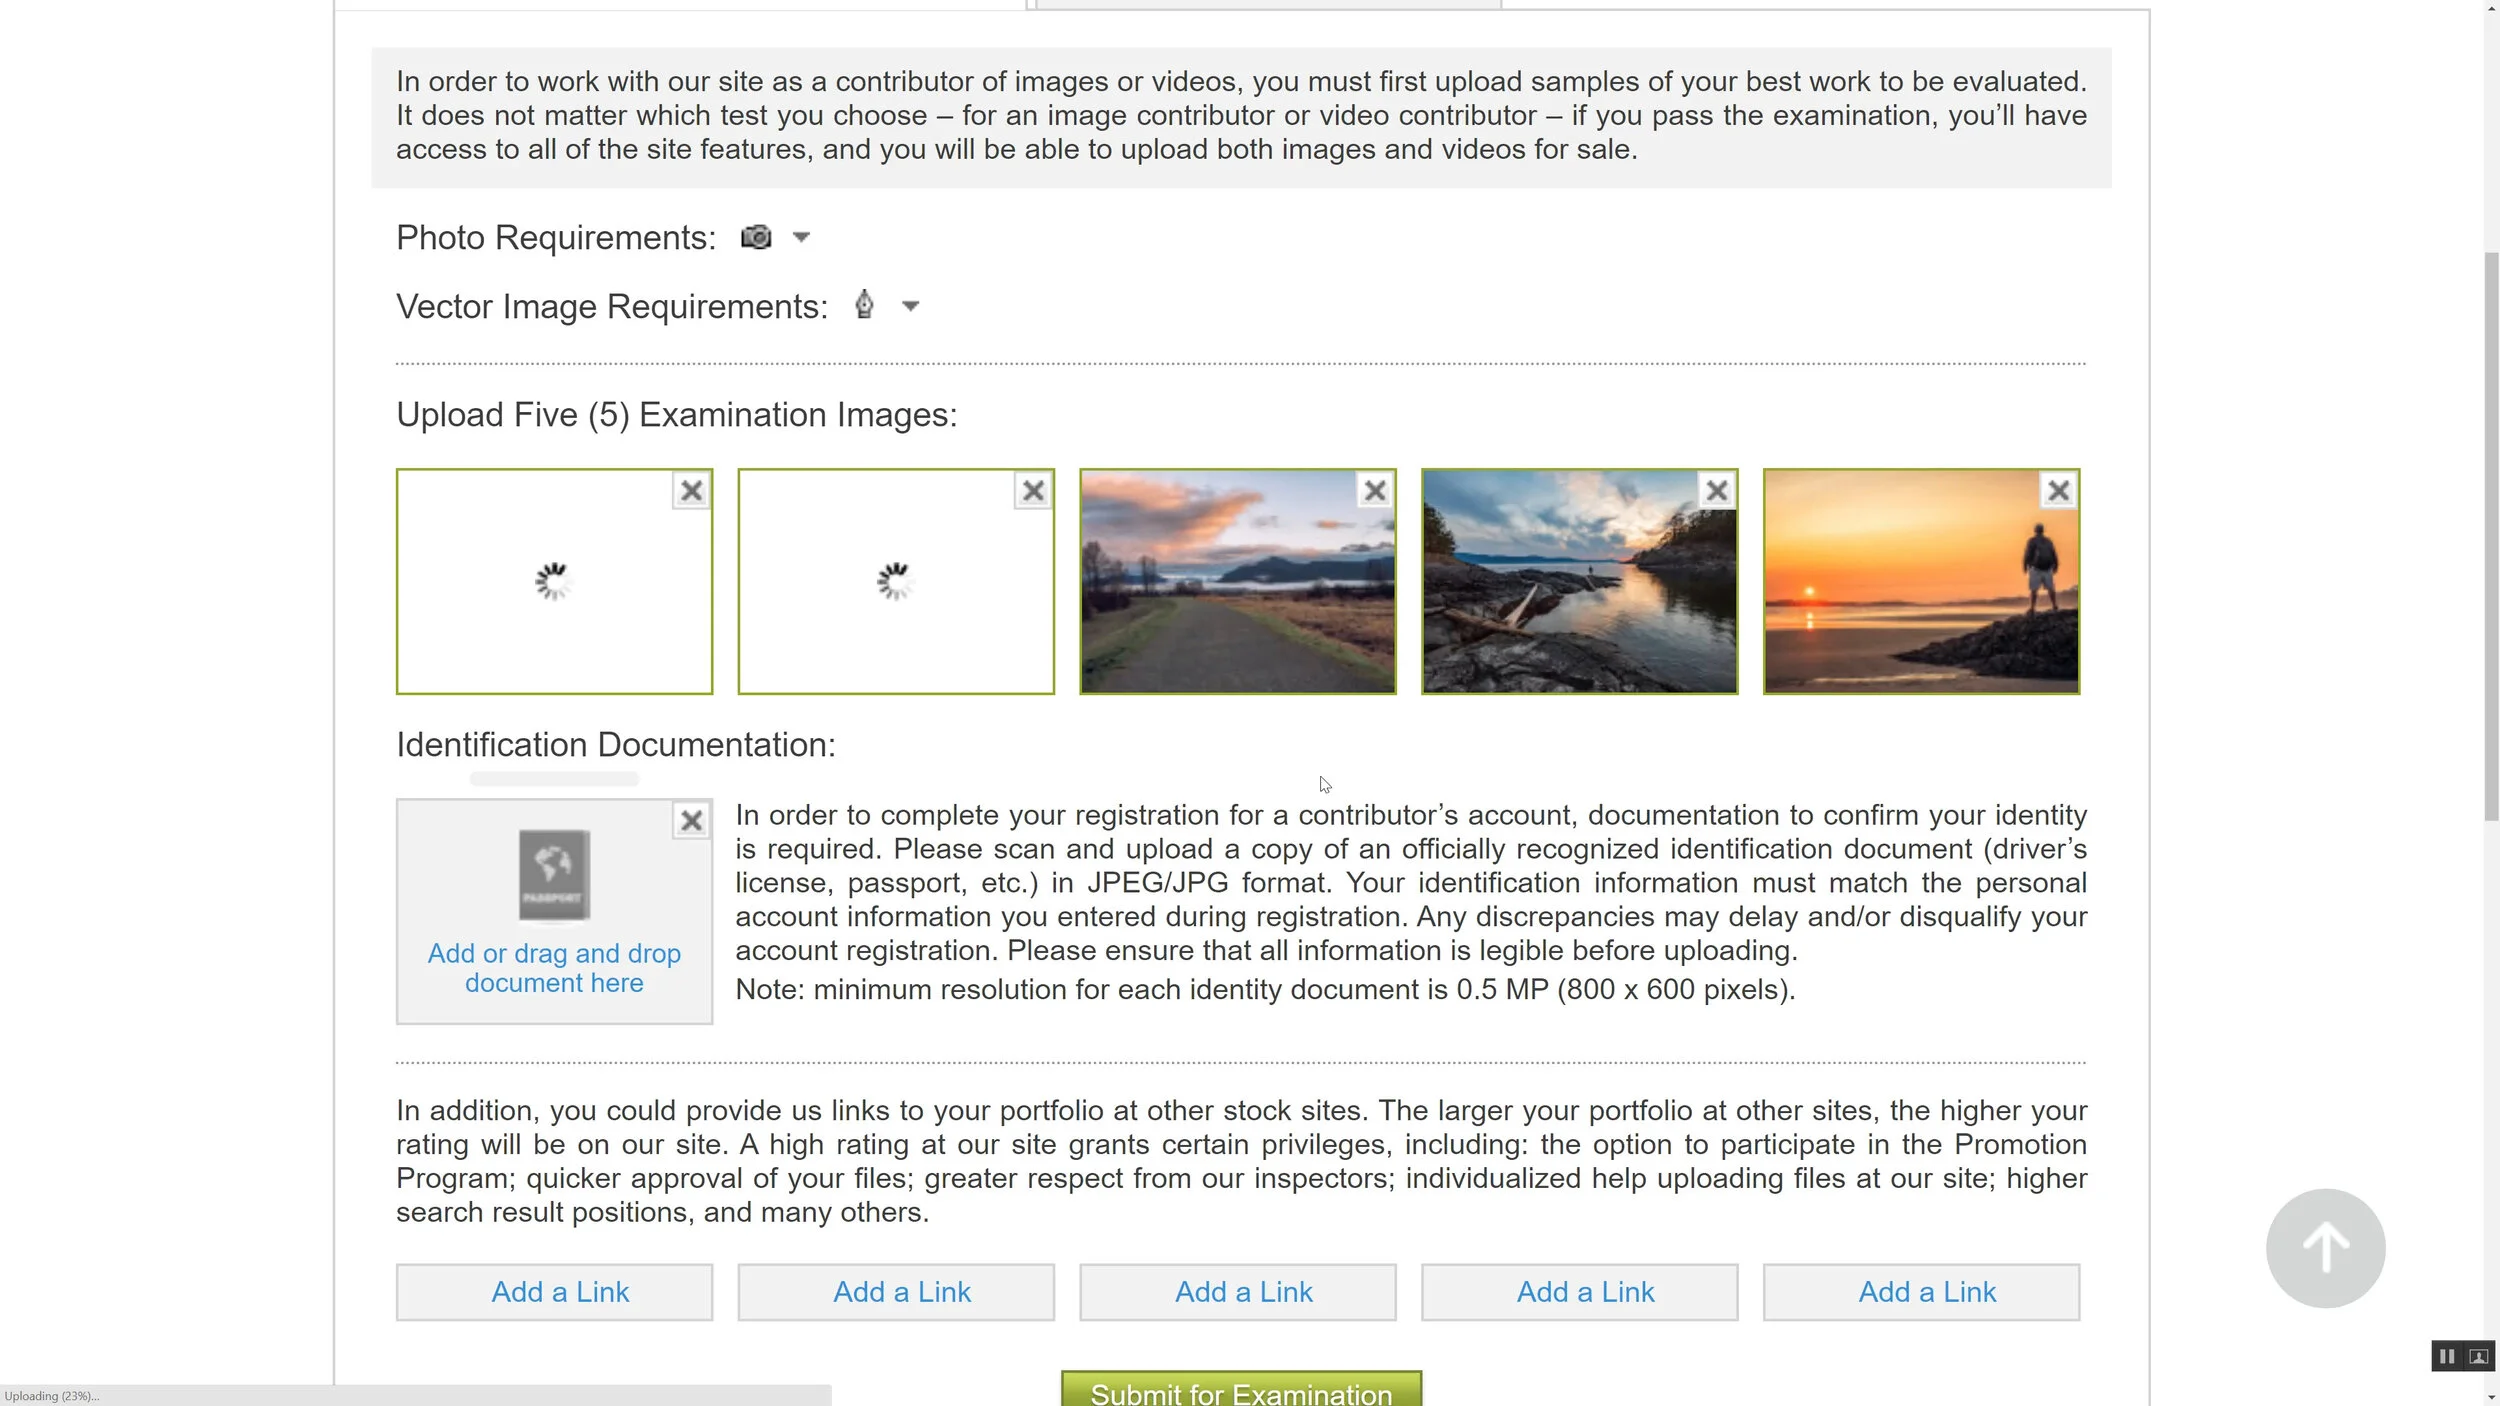
Step 3: Upload a copy of your ID
Next you will need to upload a copy of your ID, they need this for tax purposes and they will be checking that your ID matches what was filled out in the form.

Step 4: Add links to your other portfolios
Lastly you can add links to your other stock portfolios, there is where you should add links to your Shutterstock and Adobe stock accounts, including these links will increase your chances of being accepted as a contributor so add them if you have them.

If you filled everything out correctly then you will receive a message that your application will be reviewed, you will need to wait until you are accepted as a contributor before you can start uploading more photos.

How to upload a photo for sale on Deposit Photos?
Next I am going to walk through how to upload your first photo after you are accepted.
Step 1: Upload the photo
Uploading a photo in Depositphotos is straightforward. Navigate to the seller menu then click the file uploader link or just drag a photo into the uploader window. You can upload multiple files from the page but I am going to just do one right now. Next just click the Upload files button and wait for the file to finish uploading.
Step 2: Review Uploaded Photo
Once it has finished you can close the uploader but you aren’t done yet, you need to review and submit the file. So, click on the Unfinished button, if you don’t see your photo here yet then just wait a couple of minutes, sometimes it takes a little while before it shows up.

Step 3: Enter description and keywords
This page is where you enter your description and keywords, now if you added a description and keywords in lightroom or another program before exporting the photo then you will see them here already but you can add more.
Your description has to be under 250 characters and you should try to put some of your keywords in the description because it does help with the search results.
Next is keywording, you can enter up to 50 keywords per photo. if you aren’t sure how to keyword your photos, I have created a whole Youtube video about keywording and will put a link to it up here.
Step 4: Add your model and property releases
Next you need to add releases, if you aren’t sure how to use releases then checkout my Shutterstock tutorial, I go into a lot of detail about releases for Shutterstock in that video and everything I say is also relevant for Deposit photos.
Step 5: Submit for review
And that is it, click the submit button and they are sent to Depositphotos for review, Depositphotos will email you after the photos have been reviewed letting you know if they were accepted or rejected.
How do you see the status of my submitted photos?
You can also see the status with these buttons at the top, pending are photos waiting to be reviewed, online are your accepted photos and your rejected photos are over here.

Depositphotos vs Shutterstock vs Adobe Stock
Now depositphotos is a fairly large Microstock site but not as popular as Adobe Stock and Shutterstock so most photographers find they make more on Shutterstock and Adobe Stock than they do on Depositphotos with the same photos.
I actually get asked a lot in the comments if you can upload the same photos to multiple stock sites and you can as long as you don’t sign an exclusive contract with any of the stock sites which fewer and fewer are offering these days. So, if you are just getting started in stock I would recommend starting with Shutterstock and Adobe Stock before using Depositphotos.
If you are already posting to those sites then Depositphotos is a great additional site to supplement your income but it can get time consuming to upload your photos to all these sites and it is the most boring part of the process.
How to upload to Depositphotos with Photerloo?
Photerloo is a website where you can upload your photos then Photerloo uploads the photos to all your stock sites. It also suggests keywords and just saves you a ton of time getting your photos sold online.
Step 1: Login to Photerloo and click Options
Just login to Photerloo then click options and Link deposit photos.

Step 2: Enter your Depositphotos credentials
Now enter your deposit email and password. One thing to note is that you can connect your depositphotos account ONLY after you have been accepted as a Depositphotos contributor, which will give you an error if you haven’t been accepted yet.

Step 3; Upload your photo
That's it, now when you upload a photo depositphotos will be one of the stock sites available for upload and your photos will go to deposit photos at the same time as your other stock sites.
If you haven’t signed up for Photerloo yet then click this button to get your free account now.
I also created a Youtube video about this topic that you can checkout below

